GUIDE: Trouble and Maitenance
Troubleshooting & Maintenance
Best Practices
Siting PV Module
- The ideal module tilt for averaging PV production over the year is generally at the angle of latitude facing the equator. The ideal orientation for the PV module in the northern hemisphere is facing south. For example, NYC is at 41 degrees north so an optimal tilt will be at 41 degrees facing south. The ideal orientation in the southern hemisphere will be northern facing at latitude tilt. Above 23 degrees north the sun will always be to the south and below 23 degrees south the sun will always be to the north. In the tropics, between 23 degrees north and 23 degrees south, the sun will travel on both the north and south sides of the installation, so shading from both directions must be taken into consideration.
- Avoid obstructions that will shade the module particularly between 9am and 3pm.
- Vertical mounting, i.e. 90 degree tilt, or flat mounting, i.e. 0 degree tilt, is acceptable if need be but may cause decreased efficiency depending on the latitude.
Batteries
- Never mix batteries of different types, sizes, manufactures, or ages/ level of pre-existing use in the same circuit.
- Measure battery voltage with a multimeter prior to connecting it.
- A 12V sealed lead acid battery should read be between 12V and 13V. Closer to 12V it is about at 50%, which is the lowest it should be. Closer to 13V it is near 100%. Between 11V and 12V it has been depleted below the recommended depth of discharge. Under 11V it can be considered completely dead - you can use a grid powered battery charger to attempt to revive.
- Sealed lead acid batteries typically last 3-5 years, depending on how it was used and the environment it was in. If the battery is older than 3 years consider replacing it.
- Batteries types all have specific appropriate level of depth of discharge (DoD). This means that it shouldn’t be depleted below this threshold. For lead acid batteries, the DoD is 50%.
Wiring Order
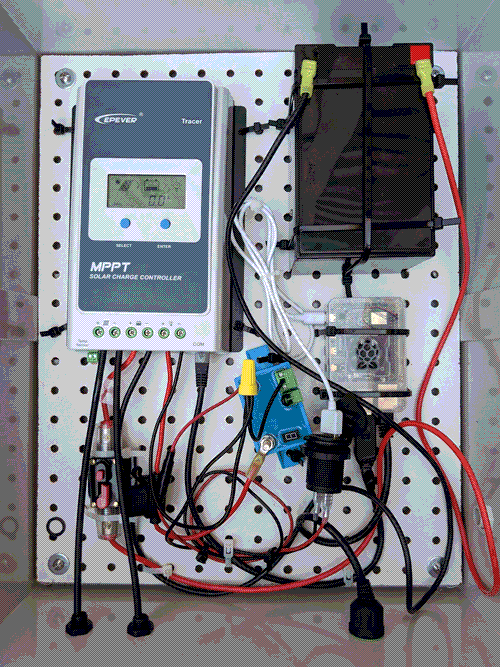
Never have the PV module connected to the charge controller without the battery. It is always a good idea to measure the voltage of all components prior to connecting them.
- To install, connect the battery first, then connect the PV module
- To deinstall, disconnect the PV module first, then the battery
- The charge controller should turn on and function with only the battery connected
Internet Connectivity
Speed Test (https://www.speedtest.net/apps/cli)
- To install run this commmand:
sudo pip3 install speedtest-cli-
Can also be installed with
sudo apt install speedtest-cliif preferred, but if installed via pip it can also be run from python. -
To run:
speedtest
Problem Identification
No output
- Check charge controller output settings
- Measure output voltage with multimeter
- Check OCPD
Unstable output
- Check battery health
- If battery voltage is below 12V, battery is too small for load and/or not enough sun for an extended period of time
- Solution: Disconnect/turn off load and wait for a sunny day for it to recharge
Battery doesn’t hold charge
- If battery is older than 3 years old, consider replacing battery
Depleted battery
- If the current from the PV module is lower than the current draw of the server, the battery will never full charge.
Battery doesn’t charge / PV current is very low
- Check solar panel function with a multimeter. Run these two tests: https://www.renogy.com/blog/how-to-troubleshoot-your-solar-panels/
Troubleshooting By Graph
Battery percentage drops off quickly once PV voltage drops
- Likely old or damaged battery
